EcoPhi Portal
3.1 Quick Guide – Set up an EcoPhi Box
-
Create a new Site for the project
Go to Sites Overview, click “Add Site” and fill out the form. -
Create a Data Source for the EcoPhi Box
Go to the Site Details to the Site Settings Tab. Click “Add Data Source”. Make sure to enter the correct EcoPhi serial number, which is printed on the Box. -
Add Components
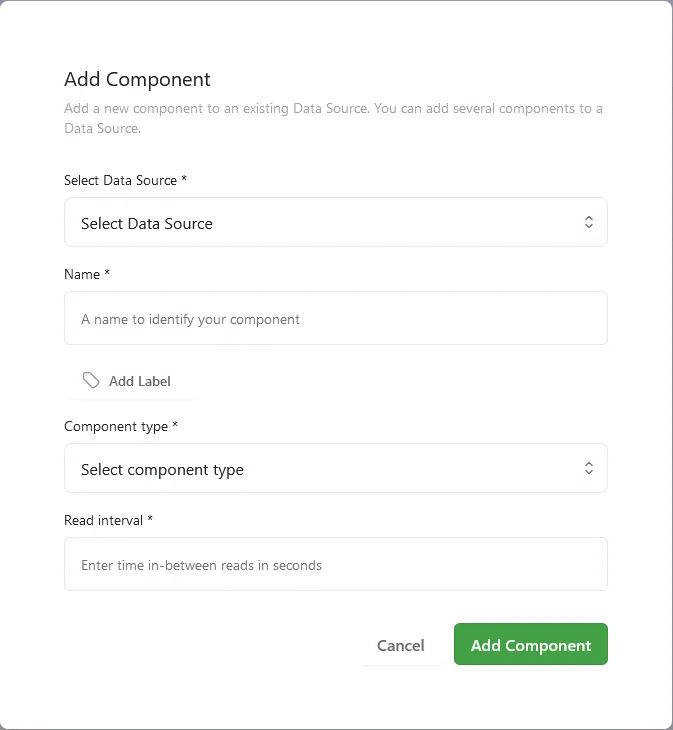
On the Site Settings Tab, click “Add Component”, select the Data Source, and fill out the form. Repeat this step for all Components.
3.2 Account Settings
You can find the account setting on the top navigation bar when you click on your user profile icon.

3.2.1 Change Account Settings
In your Account Settings, you can change your profile picture (avatar), name, email address, localization and theme.
3.2.2 Change Password
On the bottom of the Account Settings page, enter your current password and new password and confirm with “Change password”.
3.2.3 Delete Account
On the bottom of the Account Settings page, click “Yes, Delete”.
You will be required to confirm the deletion.
3.3 Site Management
3.3.1 Add a new Site
Watch this video to see how you can create new Sites:
Go to the „Sites Overview“ Tab on the left navigation bar and click the “Add Site” button on the top right.
Enter the name and an optional description. You can add labels to better filter and search your Sites.
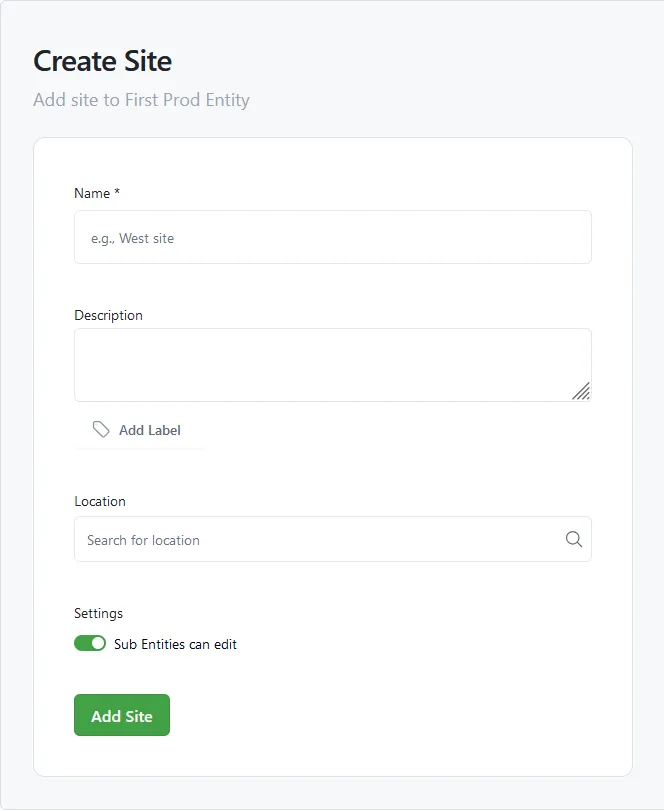
Labels are Organization-wide, so once you have created a new label, it will be available for other Sites too. Either select an existing label or type in a new label. Enter the value and click the Check Button. To enter more labels, click ”+”. To delete a label, click on ”-” and delete the label(s).

To add a location, search for the address. The correct location will be matched with the system. You can change the display title, which will be shown in the Site Overview, to fit your required format.
Click “Add Site”.
You will see the new Site in the Site Overview once it’s created.
3.3.2 Set Up and Configure a Site/Connect an EcoPhi Box
To set up your Site, you first need to add a Data Source and then add Components to the Data Source.
Go to the „Site Overview“ Tab and click on the Site go open the Site Detail View.
3.3.2.1 Add a Data Source/Add an EcoPhi Box
Watch this video to see how you can add Data Sources to a Site:
In the Detail View of the Site, go to “Site Settings” -> Data Sources section and click “Add Data Source”.
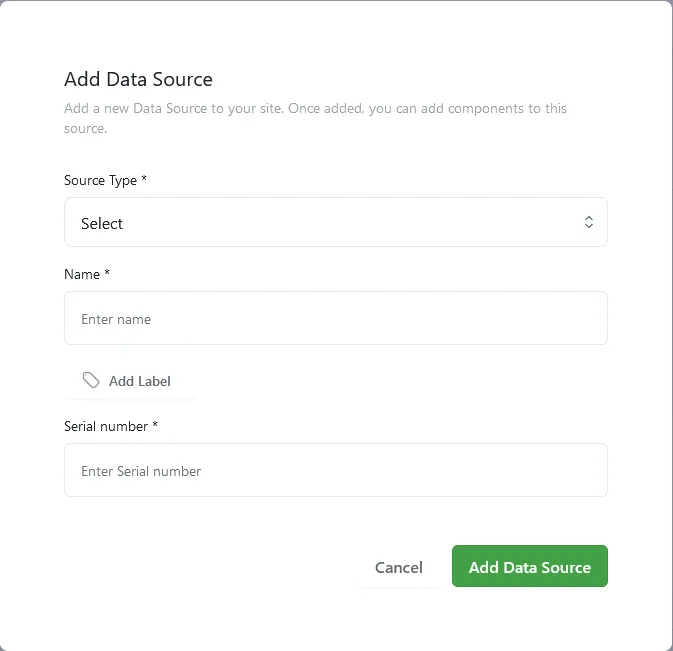
- Source Type: Select “EcoPhi Device”.
- Name: Enter a name that clearly identifies the Data Source. You can optionally add labels for better searching and filtering.
- Serial number: Enter the EcoPhi Box serial number (starting with a lower-case m…). You can find the serial number written on one of the sides of the EcoPhi Box.
Click “Add Data Source”. You will now see the new Data Source.
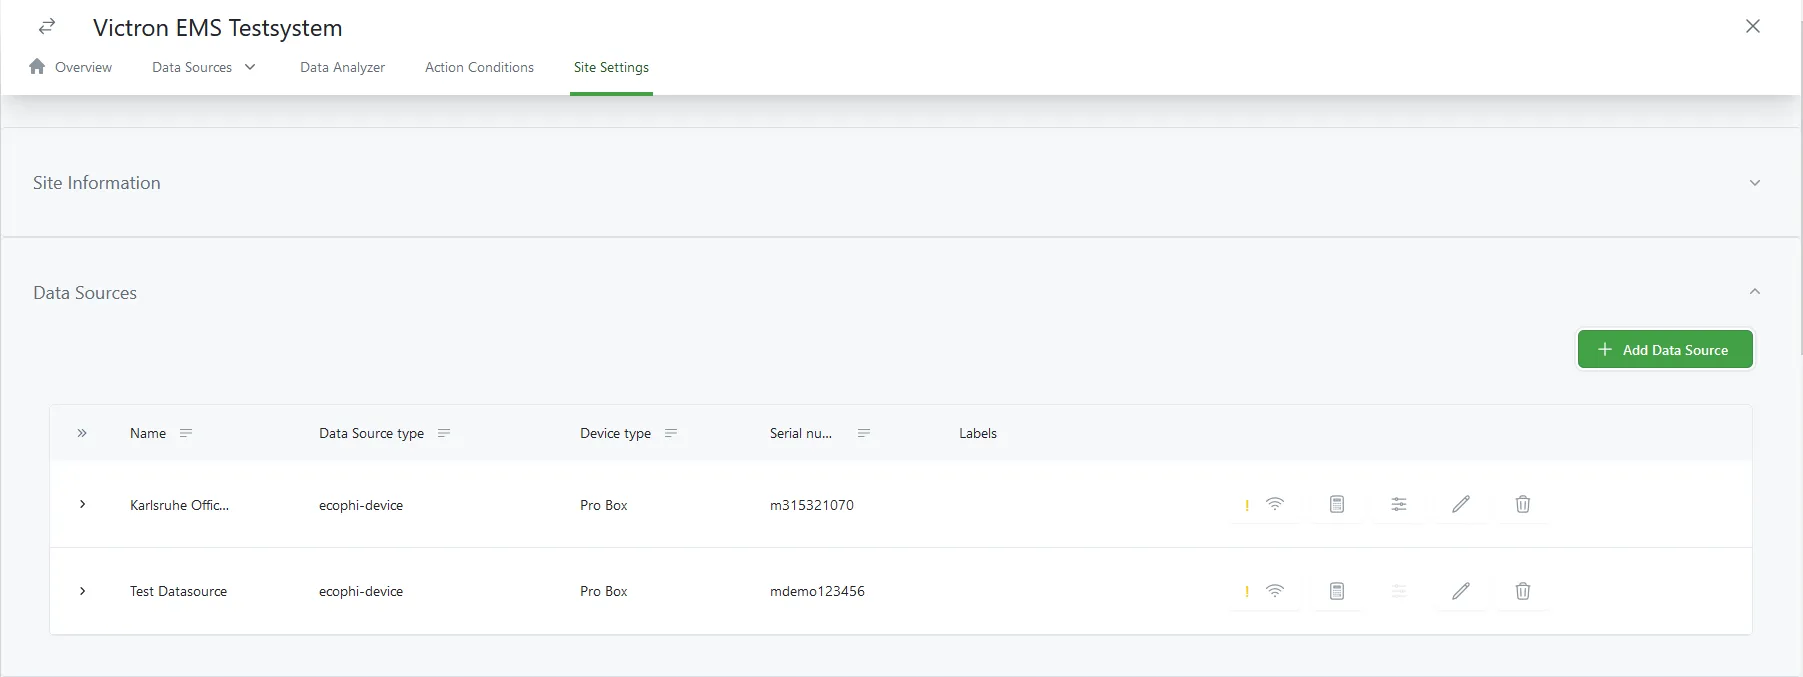
3.3.2.2 Connection Settings (Connection Order and Wi-Fi Settings)
When the Data Source is created, you can configure the Wifi connection settings by clicking on the connection icon.

You can change the connection order (SIM, LAN and Wifi). The connection order defines how the box will try to establish a connection. In case if can’t establish a connection with the first priority, it will switch to the next one.
In case you are using a Wifi connection, you can enter the Wifi name and SSID password.
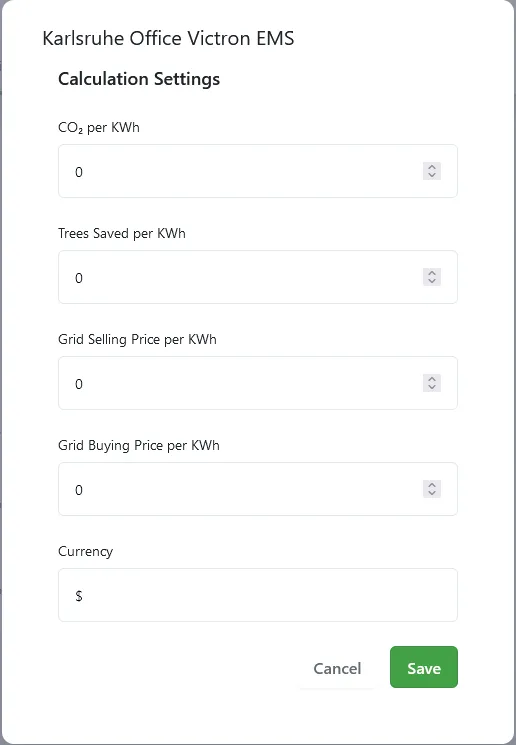
3.3.2.3 Add Optional Calculations
When you set up a Data Source, you can optionally define ecological and economical calculation factors, which are CO2 per kWh, Trees saved per kWh, Grid selling price and Grid buying price.
3.3.2.4 Add Components/Connect Equipment to the EcoPhi Box
Watch this video to see how you can add Components to a Data Source:
On the “Site Settings” tab, click “Add Component”.
Select the correct Data Source.
Enter a name that clearly identifies the Component.
You can optionally add labels for better searching and filtering.
Select the correct Component type from the list. Depending on the Component type, different settings need to be made.
Serial Components
Select the correct Equipment from the list, enter a read-out interval, enter the Modbus ID and an optional IP address and port.
The Role defines which system parameters are being monitored by the component and if it needs to be controlled as part of an automated Energy Management.
Example: An energy meter can be defined to measure the Grid, Load, Solar or Battery power. These measurements will then be reflected in the total system value.

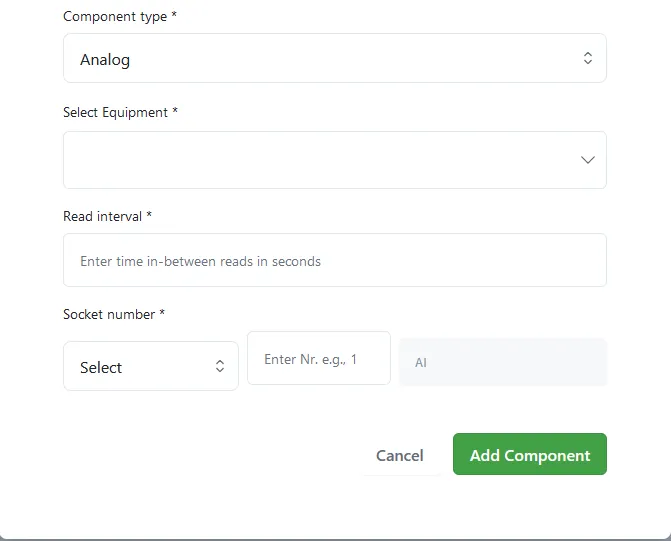
Analog
Select the correct Equipment from the list. The range indicates the measurement range. Make sure to select the correct measurement range which matches your sensor specifications. The measurement range and sensor type is usually printed on the sensor.
Enter the read-out interval.
Enter the correct socket number. You can define the Component as an analog input or analog output.
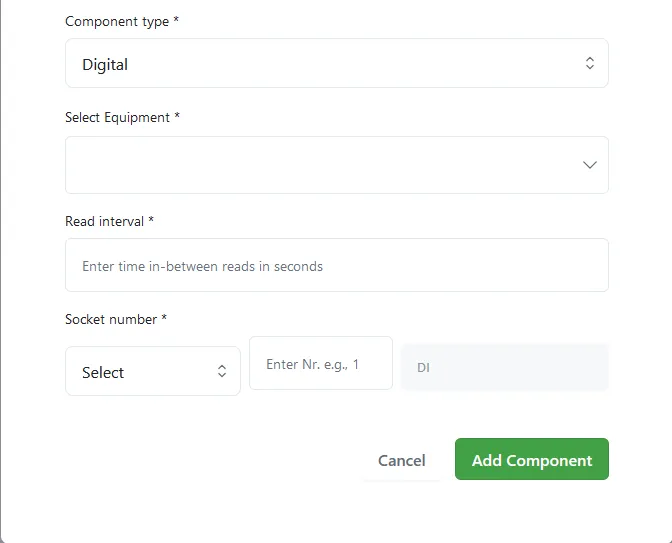
Digital
Select the correct Equipment from the list. In case of a digital pulse sensor, make sure you select the equipment with the right pulse ratio.
Example: There a digital pulse water meters, which count 10, 100 or 1000 liters per pulse. Selecting the wrong pulse ratio will thus lead to wrong measurements.
Enter the read-out interval.
Enter the correct socket number. You can define the Component as a digital input or digital output.
3.3.3 Deleting and Updating Data Sources
Go to “Site Settings” -> Data Sources.
Click the Edit Data Source or Delete Data Source icon.
3.3.4 Deleting and Updating Components
To delete or update Components, go to “Site Settings” -> Components. On the right side of the Component, click on the Edit Component or Delete Component icon.
3.3.5 Share a Site with a Sub-Organization
Watch this video to see how you can share Sites with Sub-Organizations:
There are two methods to share a Site with a Sub-Organization.
Method 1 - Select Sites for Organization
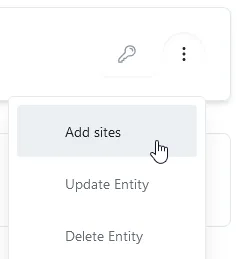
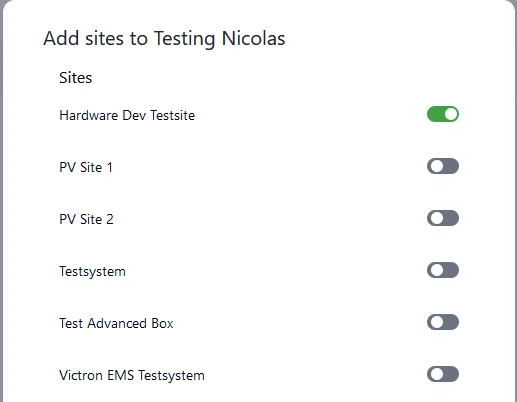
Go to “Organization Settings” -> Sub-Organizations. Click on the three dots of to the Sub-Organization that you want to share the Site with and click “Add Sites”.
Select the Site(s) that you want to share and click “Add Sites”.
Method 2 - Select Organizations for Site
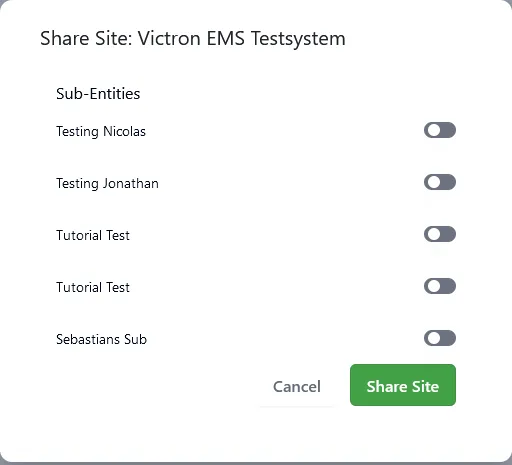
Go to the “Site Overview” and expand the Site by clicking the arrow on the left. In the bottom right navigation bar, click on the “Share Site” icon.

Select the Sub-Organization(s) that you want to share the Site with and click “Share Site”.
3.3.6 Set and change action conditions parameters
Under the “Site Details” of a Site, go to the “Action Conditions” tab, where you can define action conditions such as controls and logic parameters. The availability depends on your specific project and if action conditions have been initially set up for your Site.
Example:
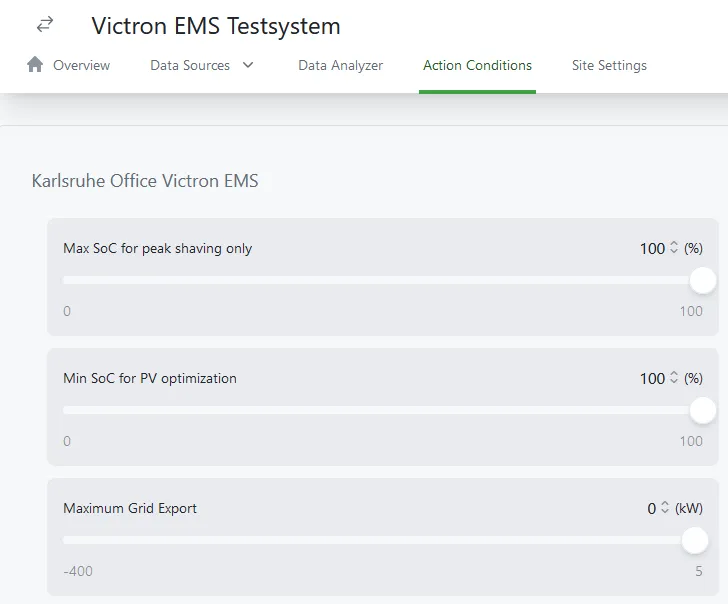
Once you have done the changed, click “Save”.
To undo the changes, click “Reset”.
3.3.7 Edit an existing Site
Go to the „Site Overview“ Tab. Expand the Site by clicking on the arrow on the left.
On the right side of the bottom navigation bar of the Site, click the “Edit” icon.
Change the Site information and click “Update Site”.
3.3.8 Delete an existing Site
Go to the „Site Overview“ Tab. Expand the Site by clicking on the arrow on the left.
On the right side of bottom navigation bar of the Site, click the “Delete this Site” icon.
You are required to confirm the deletion.
3.3.9 Create and use labels
Labels are defined as Key-Value Pairs.
When you create or update a Site, Data Source or Component, you will see a section to add Labels.
To add a new Label, type in an individual Label name and click ”+ New category … ”. Enter the value and save the Label.
To select an existing Label, select the Label in the drop-down list, enter the value and save the Label.
3.4 Organization and Sub-Organization Management
3.4.1 Create a Sub-Organization
Watch this video to see how you can create Sub-Organizations:
Go to “Organization Settings” on the left navigation bar and open the Sub-Organizations section.
You will see a list of all Sub-Organizations. Click “Add Sub-Organization”.

A name is required.
You can add yourself as an Owner, if you want to manage the Sub-Organization. You can also invite other Owners via Email.
Select the required permissions:
- Edit Sites: If enabled, Sub-Organizations can edit Sites, e.g. change Site name and information or add Data Sources and Components. Creating new Sites is not possible, as this can only be done by the Main Organization.
- Use Sub-Organizations: If enabled, Sub-Organizations can create own Sub-Organizations and share Sites with their Sub-Organizations.
- Use API Keys: Defines, if API keys can be created on the Sub-Organization level.
Click “Create Sub-Organization”.
3.4.2 Add an API Key
Watch this video to see how you can create and manage API keys:
Go to “Organization Settings” on the left navigation bar and click on Manage API Keys.
You will see a list with already created API keys.
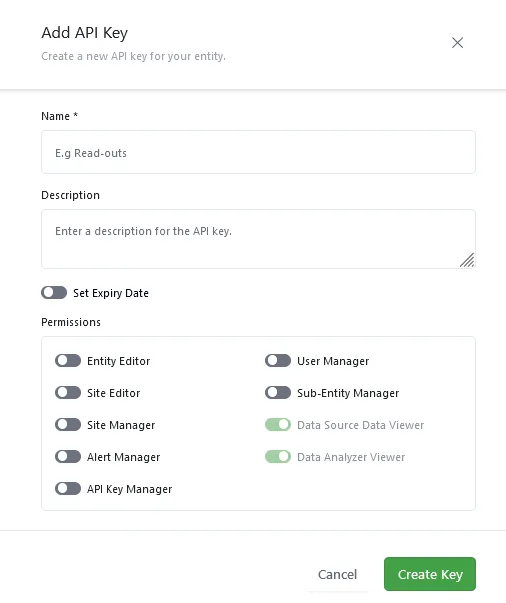
Click on “Create API Key”.
Define a name to identify the key. A description and an expiry date can be defined optionally.
Make sure you select the right permissions and click “Create Key”.
A window will open with the API key. Copy the key to be able to use it.
3.4.3 Create Alerts
Go to “Alerts” on the left navigation bar.
You will see a list of all the existing alerts for all Sites of the Organization.
Click on “Add Alert”. Fill out the form and click “Add Alert”.
3.5 User Management
Watch this video to see how you can invite members to your Organizations:
To add or manage a User for a specific Organization or Sub-Organization, you must switch to the respective Organization via the Organization Picker on the top right of the navigation bar.
3.5.1 Add new Users to an Organization or Sub-Organization
To change Organization settings and add users, you need to be logged in at the Organization.
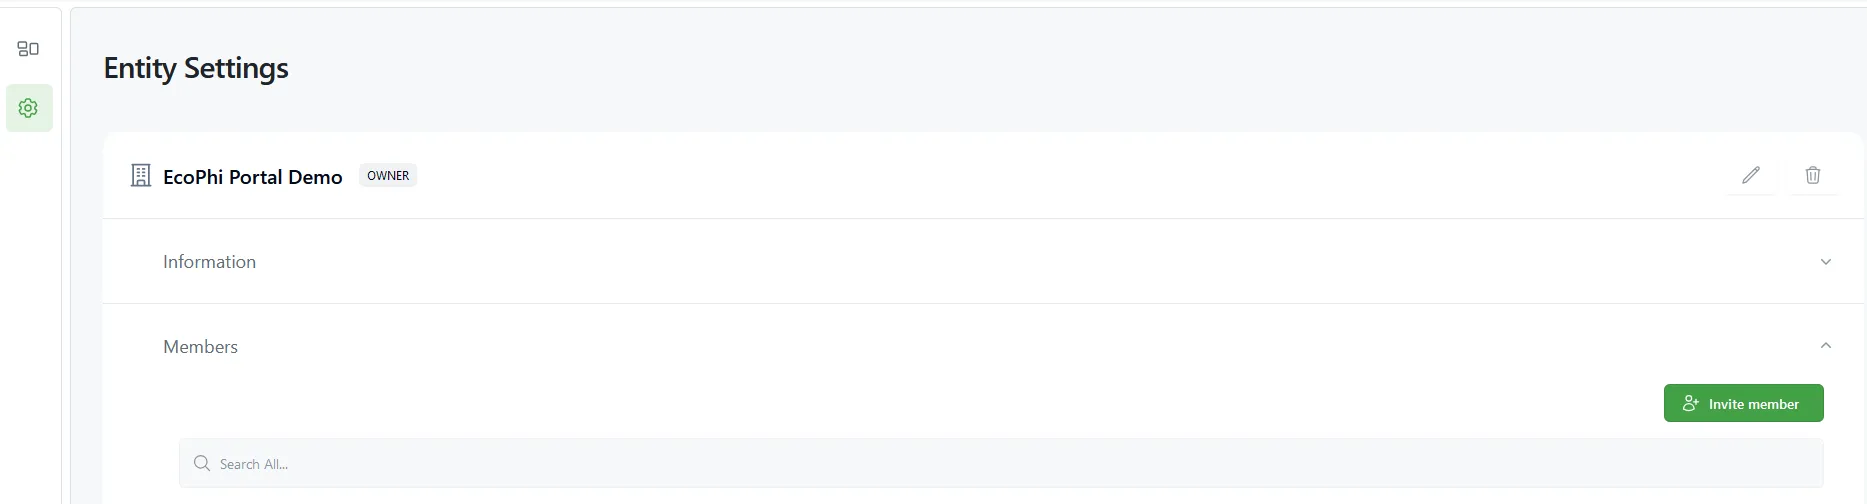
Go to “Organization Settings” -> Members and click “Invite member”.
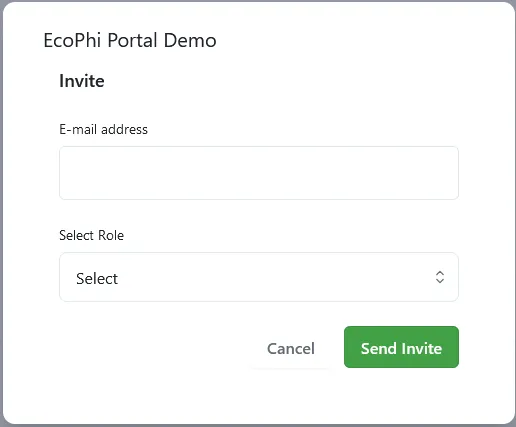
Enter the Email address and select the Role. Click “Send invite”.
The user will receive an email to accept the invite. Once the user has accepted the invite, they are added as a member of the (Sub-)Organization.
3.5.2 Accept invites to a (Sub-)Organization
Users that have been invited to a (Sub-)Organization must accept the invite.
Hover over the Organization picker on the top right of the navigation bar and click on “Organization Memberships”.
You can also see open invitations on the welcoming page. Click on the logo on the top left to go to the welcoming page.
You will see the invites and existing memberships.
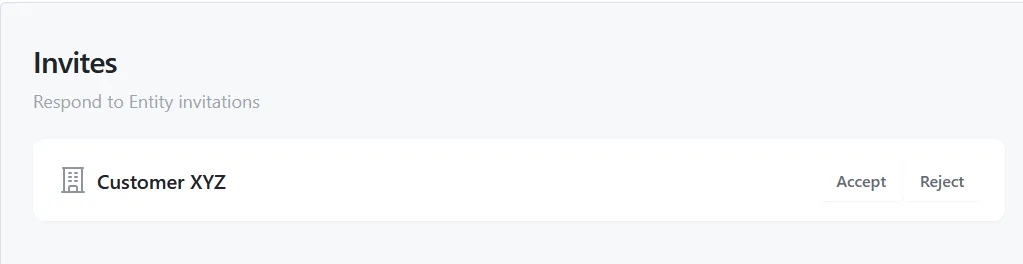
Accept or reject the invite.
3.5.3 Change the user permissions
Go to “Organization Settings” -> Members. On the right of the member entry, click “Edit Role”.
Select the Role and click “Update Access”.
3.5.4 Remove a user from an Organization
Go to “Organization Settings” -> Member section.
On the right of the member entry, click “Remove Membership”. You will be required to confirm the removal.
3.5.5 Create a new account
To create an account, go to the Sign-up page and click on “Don’t have an account? Sign-up here”.
Fill-in the name and password and click “Sign up”.
You will receive an email to verify your email address. Check your Spam, if you don’t receive a mail.
::note
If you haven’t received a mail, go to the Sign-Up page, click on “Verify E-mail”. :::
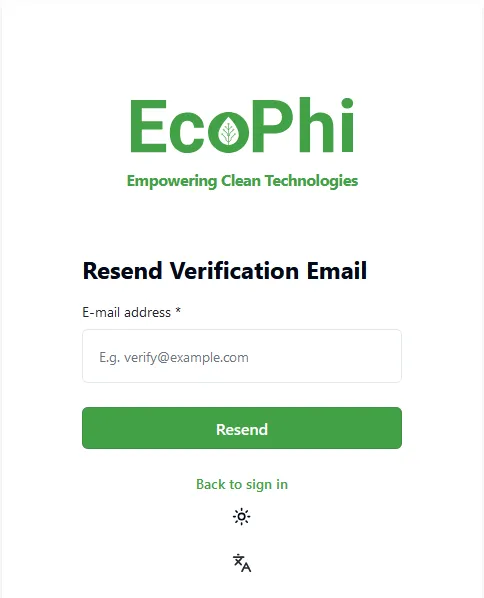
Enter your email address and click “Resend”.
3.6 Monitoring Dashboards
Go to “Site Overview” and click on the Site to open the Site Detail View.
In the Site Details, you can find several Tabs for monitoring and analyzing your data.
Overview: Here you can see the overview dashboard of your Site. The Overview dashboards aggregate the data of all Data Sources that belong to the Site.
Data Sources: Shows the dashboards of the Data Sources (e.g. the connected EcoPhi Boxes). Here you can see the detailed measurement data of all connected and configured Components.
Data Analyzer: Allows you to show and compare all raw measurement data that exists in the Site. You can select each Data Source and Component and select single or multiple measurement values.
Watch this video to see how to use the Data Analyzer:
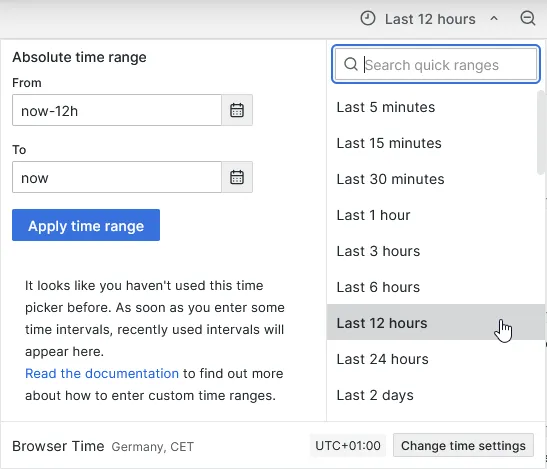
3.6.1 Changing the time range
Click on the time picker on the top right.

You can select a pre-defined time range or specify an individual time range. Depending on your location, you can also change the time settings.
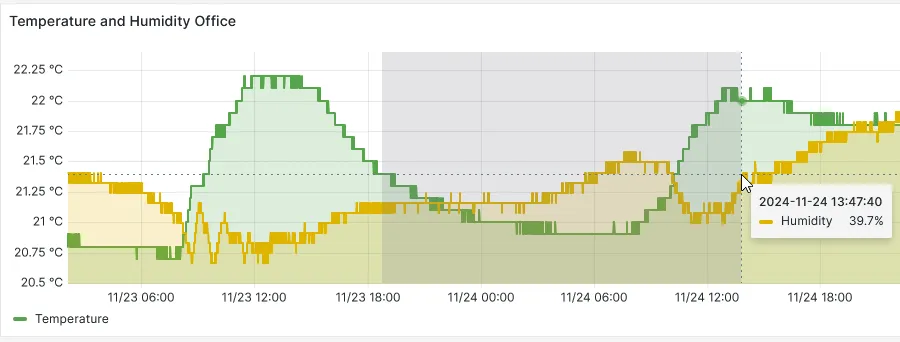
You can also adjust the time range directly within a graph:
- Hover over the graph.
- Press and hold the left mouse button.
- Drag the mouse to highlight the desired time range.
- Release the mouse button to set the new time range.
3.6.2 Update the data
The dashboards update the data when they are being opened. Once open, the dashboards don’t automatically update by default.
To retrieve the latest data, click on the refresh button on the top right.
3.6.3 Show and hide data in a graph
You can select individual values within a graph by clicking on its name in the legend. To display all values again, click on its name once more.
To select multiple values simultaneously, hold down the Ctrl key (Cmd key on Mac) and then select the desired values by clicking on its names in the legend.
3.6.4 Update Dashboard Templates
Upon Site and Data Source creation, you can select the template that should be used for your dashboards.
You can also change the template later.
Site: To change a Site Overview Template, go the Site Settings, expand the “Site Information” section and click on the Edit-Icon. Select the Dashboard Template and update the Site.
Data Source: To change a Data Source Template, go to the Site Settings -> “Data Sources” section and click on the Edit-Icon of the Data Source. Select the Dashboard Template and update the Data Source.
3.7 Data export as csv or Excel
3.7.1 Download a csv/ Excel file
On the Site-Details you can find the Export tab.
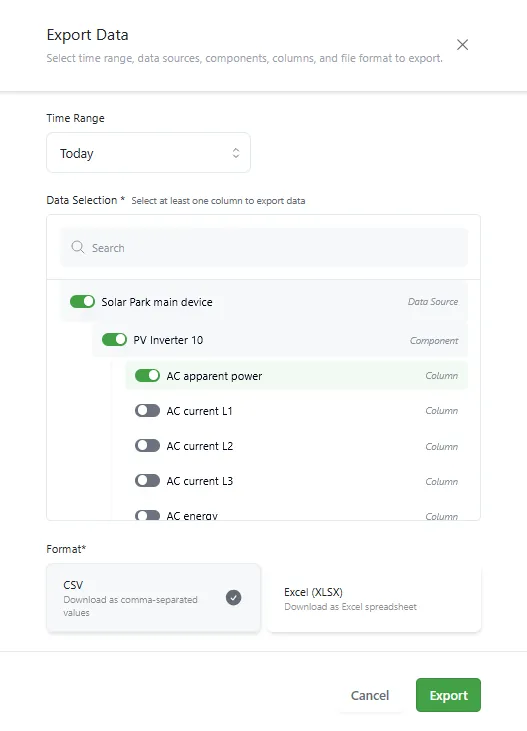
Select a given time range or define an individual time range.
For each Data Source and Component, you can select the required system value(s).
You can download the data as a .csv or .xlxs file.
Click “Export”. The file will be automatically downloaded.
3.7.2 Export for single panels
You can download data for each panel in the dashboard. To download data as a csv or Excel file, first select the required time range on the dashboard. Go to the dashboard panel of which you want to download the data. Click on the three dots on the top right of the panel.
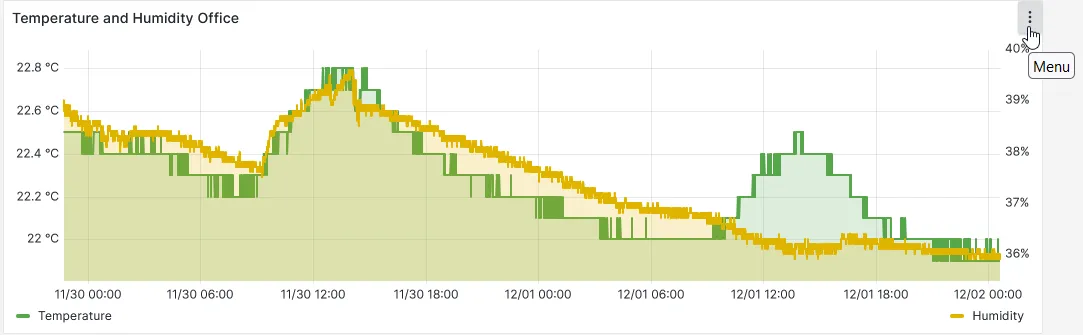
Go to “Inspect” -> “Data”.
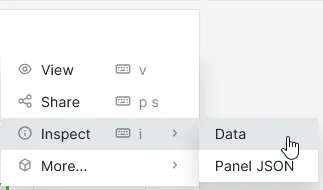
Open the “Data options” section to select between formatted or raw data and to select headers for Excel. When you’re ready, click “Download CSV”.

3.8 Alerts
Alerts can be used for automatic notifications based on system data related events. You can find the alert section on the left navigation menu for the complete Organization. Alerts for single Sites can be found as a tab on the Site Detail window.
3.8.1 Add a new alert
Click on alert policy
Information: You can set if the alert is considered as a critical alert. If the alert is set to critical, you can specify if a triggered alert needs to be acknowledged
Condition: You can define a trigger parameter, an operator and a comparison parameter. The trigger parameter needs to be a system value. The comparison parameter can be either a fixed value or another system parameter.
Notification:
Notification frequency: You can select how often you want to be notified.
You can select one or more recipient addresses, separated by comma.
You can also leave this field empty. Then the alert will be tracked on the dashboard without notification mails.
Once an alert policy has been created, it will appear under Policies. Here you can activate/ deactivate, modify and delete the alert.
3.8.2 Analyze alerts
On the top of the alert page, you can see all triggered alert incidents in the selected time range.
On the right, you can switch between table and item view. The item view allows you to filter the alerts by Acknowledgement.
Alerts which require acknowledgement, can be acknowledged here.